| Bruce's Center Beam Lumber Haulers | |
|---|---|
| Bruce Jahn | |
|
Many G scalers have, over the years created wonderful logging operations. I also have a nicely weathered Heisler
pulling a string of log cars which I built back in the early 90's. However as my interest in the modern world
of log/lumber operations has grown, I decided I wanted to build a train representing what one might see on today's
railway.
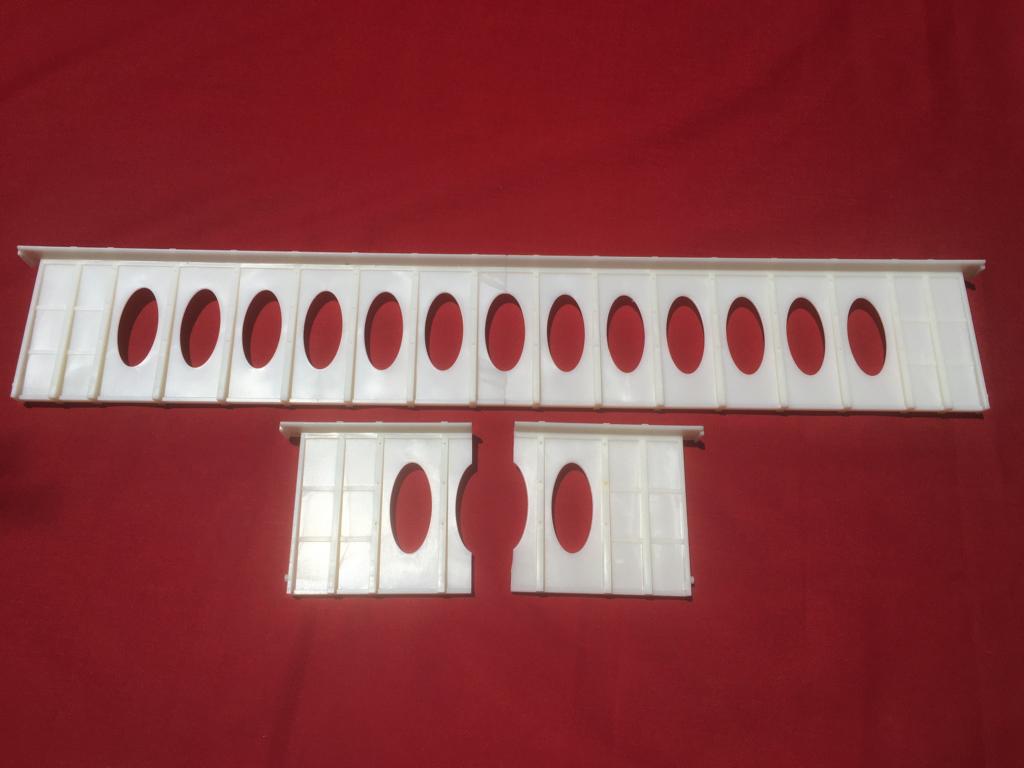
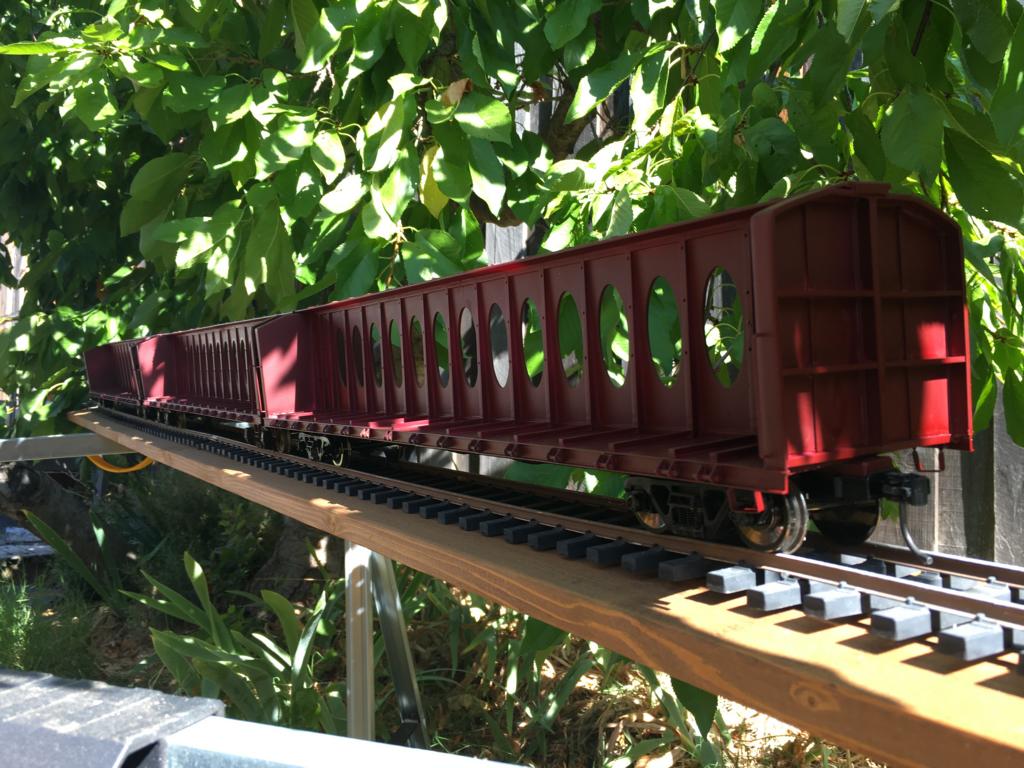
Yes I know, USA Trains makes a center beam car, but I've yet to see a car hauling lumber that is based on a 42 foot long flat car so I needed to go a different route. I do though, like that "Parlor" style with those big oval cutouts in the beam so that's where I started. USA Trains does sell just that center beam part so with the thought of making three cars, I ordered six of the plastic beams. Since I presumed I'd only be using the train on the tracks of the Diablo Pacific Short Line, the cars needed to fit into our standard sized tubs for transport, so that was my length criteria. I cut the panels in such a way that putting two longer parts together with styrene adhesive would make for a 23" long car. Yes, I know that translates to a 55 foot long car in 1:29 when the prototypes are 71', but I had to make them usable. | |
 | |
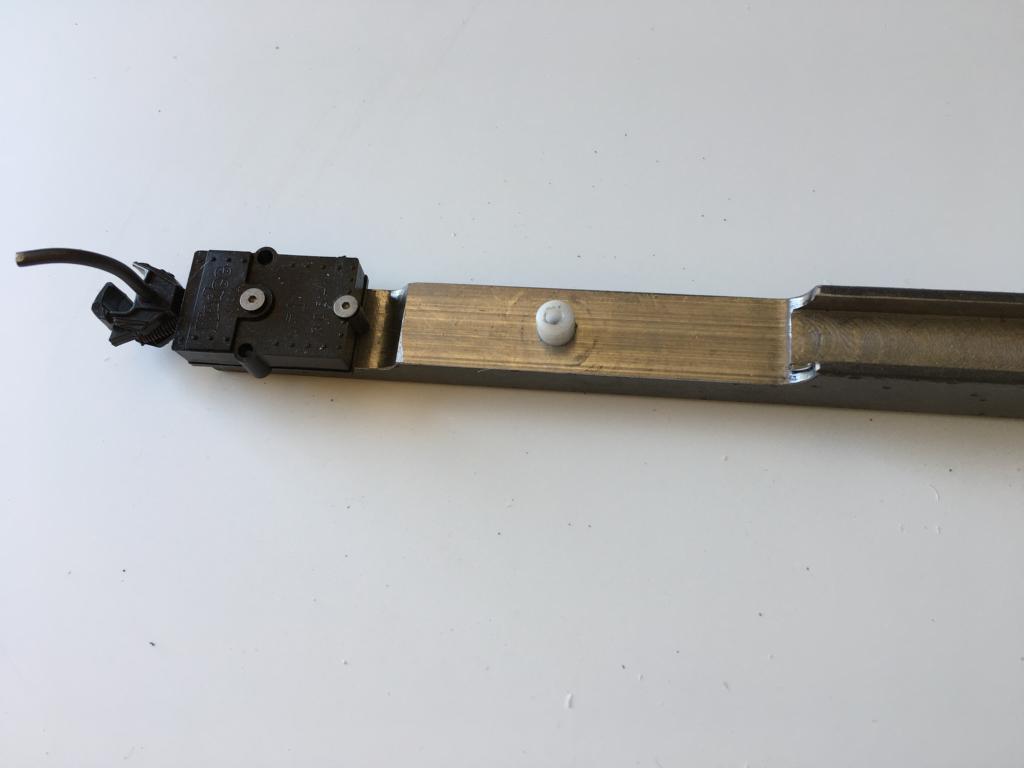
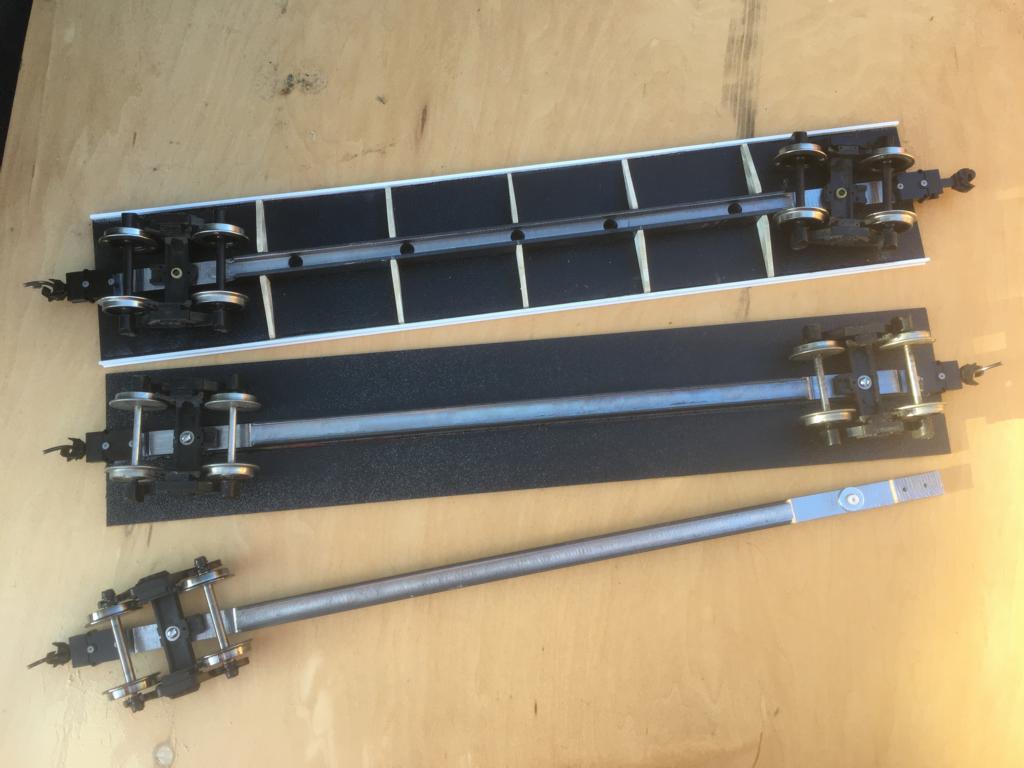
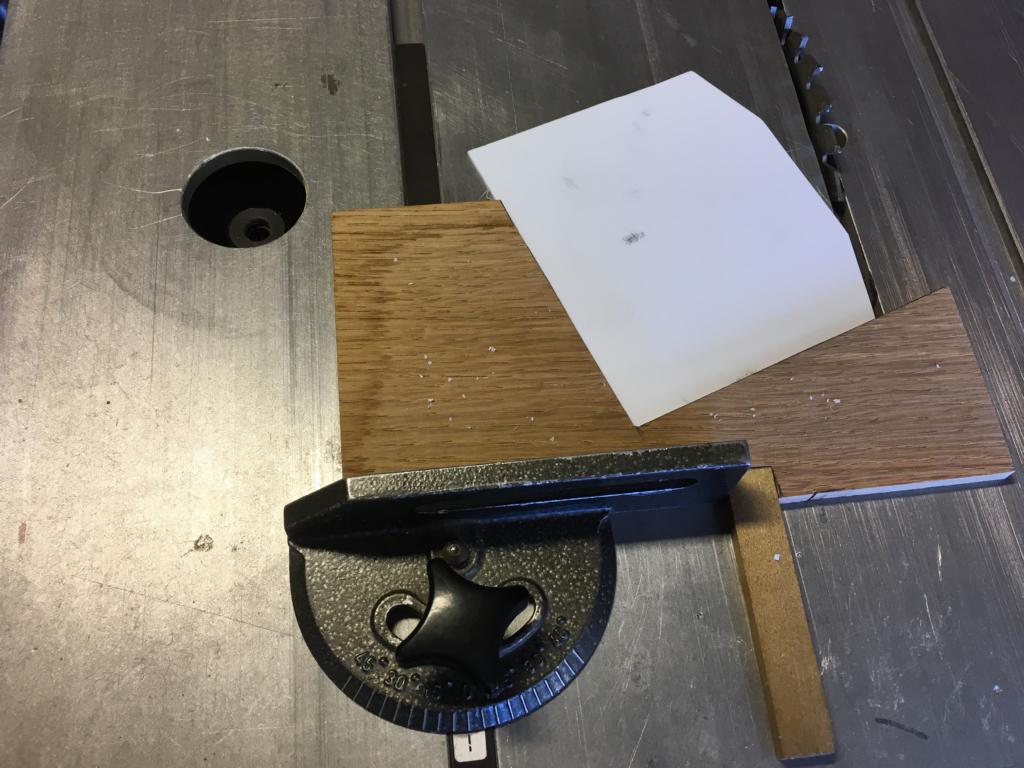
| For the main under-structure. I started with 5/8" square steel and machined the ends to hold Kadee couplers at the right height and mount the trucks. This seemed quite heavy so I machined a 3/8" slot down the center to remove some weight. | |
 | |
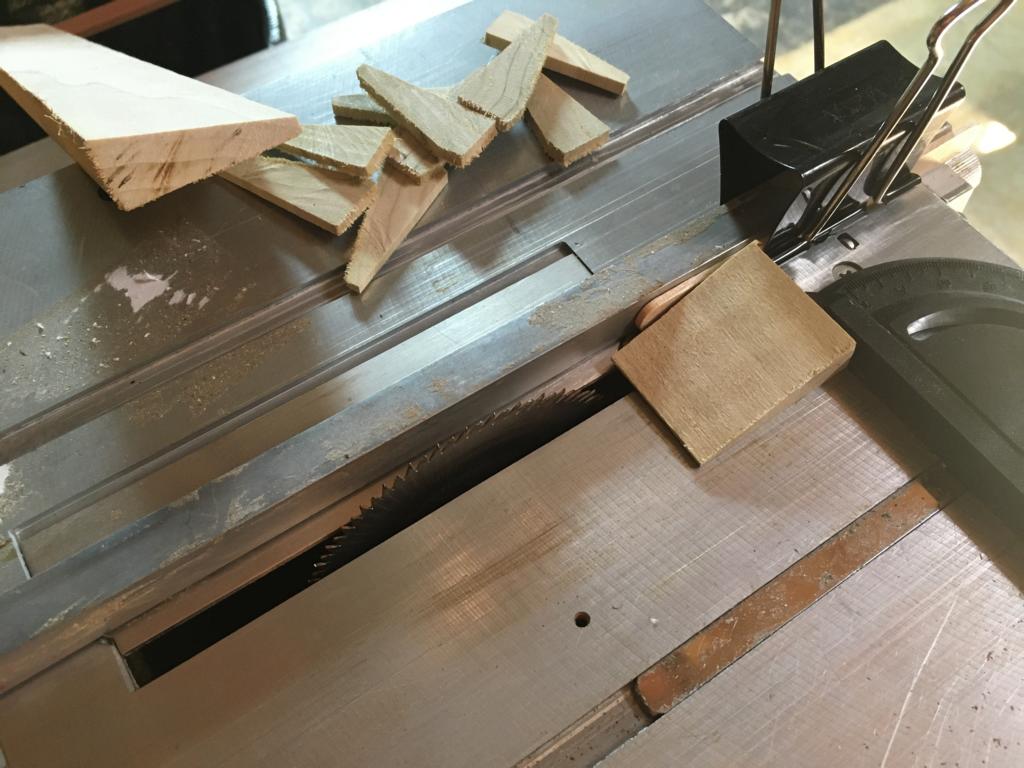
| I then glued a piece of 1/8" thick ABS to the steel beam with E-6000 followed by using super glue to attach a length of styrene channel along each edge to represent the side sills. The gussets under the floor were made from poplar cut to an appropriate shape, first cutting a long board into the cross section shape, then cutting the individual 1/8" thick gussets. | |
 |
 |
| The bulkhead ends were made of styrene starting with a flat piece of 0.060 thick sheet cut to the shape I was looking for. | |
 | |
|
The Bulkheads were then put together using Evergreen and Plastruct shapes and styrene adhesive one piece at a
time. Gaps were filled with Liquitex modeling paste with repeated filing/sanding till all was smooth and looked
complete.
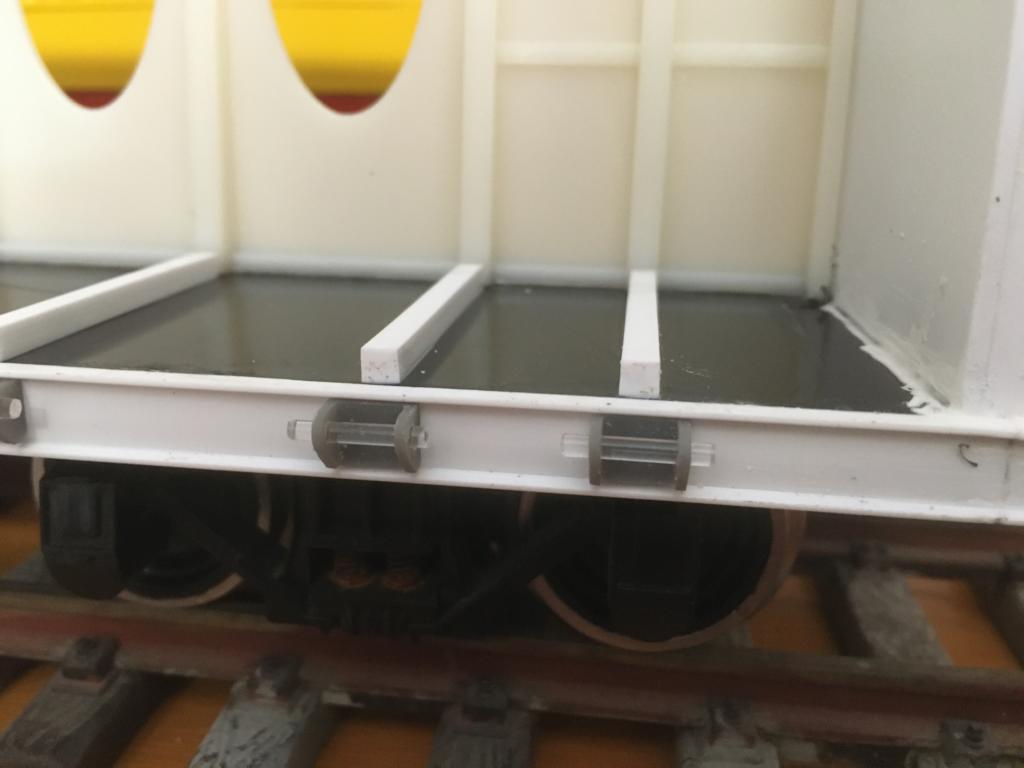
To me, an important feature of these cars are the ratcheting tie downs along each side. I drew up what I thought might work in Autocad and sought a 3D printer to make the parts for me, but alas, all said the parts were too small. In the category "it's not what you know but who", I then contacted Colin Camarillo (BAGRS past president) who claimed his printer could do it. Low and behold, when I met Colin for the handoff, he had printed 98 of those tiny little buggers. The 1/16" diameter hole through each for the acrylic axle proved exact enough that filing wasn't even needed for a snug fit. These were glued to the channel with super glue. | |
 | |
|
I then cut 0.015" brass sheet into thin strips and bent for the footsteps (E6000 adhesive), then 0.015" brass rod
bent for grab irons (super glue). At this point I knew there were additional pieces I could add including ladders
and brake wheel, but thought to my mind, it was enough so I painted the cars with Liquitex Cadmium Red Deep Hue 3
spray paint.
I haven't decided yet if I want to put decals on the cars. Many of these cars are beat up enough that it's hard to even read the text, but I might one of these days. I'm currently waiting for one of the customers of the Coos Bay Rail Link, Southport Lumber, to send me their logo so I can make some wraps for the lumber loads I've cut, but this isn't time in world events to push, so I'm leaving them alone for a while. | |
 | |
| Now onto some spine hauling log cars and some chip cars. More to come. | |
